
It is fair to say that the front bumper was more of a challenge than the rear. The rear was relatively straightforward as the underside of the bumper was oversized so that it could be secured to the rear valance, as well as being secured by two bolts, with spacers, through the centre of the bumper.
The front bumper could not be secured on the underside and attempts to keep it in place using just the two bolts has proved fruitless on a number of attempts over the last couple of years.
After a lot of thought, I came up with the idea of fabricating brackets to increase the surface areas that touch when bolting the bumper on. If I can increase the surface area, then I hope that the bumper can be fitted more securely.
Following some measurements and countless prototypes, I came up with a 3D model of a spacer that would hopefully work. I then 3D printed the spacer in three parts, with either end being printed in flexible PLA and the centre in PLA+. This method should help further, by allowing the two ends of the spacer to act like a rubber washers, compressing slightly when tightening the bolts.
It seams to have done the trick and feels quite sturdy. I need to fit the bumper trim and reassemble again, but at least I think I have come up with a really good solution.

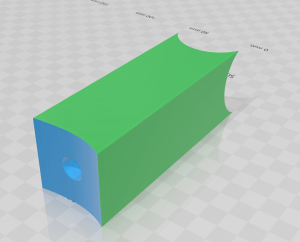
The 3D print shown above is 90 degree rotated from how it is actually installed. The curve on the front part follows the curve of the front of the car, whilst the rear indentation matches the back of the bumper where the bolt is attached. The whole in the middle is for the bolt that secures the bumper to the front of the car.