
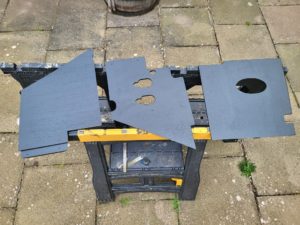
Again, trying to keep to as to the original Speedster as much as possible, we have fabricated some plywood pedal boards and kick plates. These took quite a lot of time to figure out and template, before finally getting it right. The photo below shows them out of the car, being painted (left two are pedal boards and right one is one of the kick boards (with hole for speaker)).
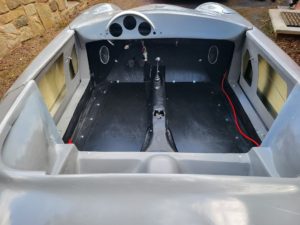
The pedal and kick boards can be seen installed in the following photo, along with speakers.
You can also see the instrument panel cut-out, plus some of the first fix electrics (wiring loom next to left hand heater channel and 170amp live cable for starter, next to right hand heater channel).
The parking brake lever is also visible in the photo below, just under the instrument cluster, sitting in the locked position (i.e. 10 to 5).
The first fix of the electrics have also been completed, as you can see in the photo below. It probably took a whole day to install the wiring loom, but took countless days to figure out what was what… However, that is to be expected for £150 on eBay, compared with a new one from Chesil for £900. All wires and functions now known and labeled up accordingly.
The battery is installed at the very front of the bonnet, which is where they were originally located, but did require some re-jigging of the Chesil wiring loom, as that was designed for it to sit on the rear seat / shelf.
Also visible in the photo below is the fuel tank, which was previously test fitted, but is now fully connected to the hard fuel line in the chassis tunnel, as well as to the fuel filler (on wing), breather pipe and vent pipe (right hand side of fuel tank) which vents to the underside of the car.
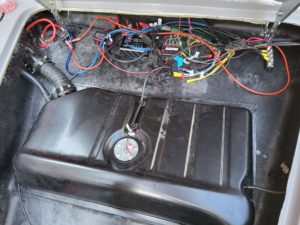
Whilst you cannot quite see it in the photo above, the brake fluid reservoir has been installed in the front bonnet and connected to the master cylinder. Once this was complete, the brakes were all bled and all is working well.