I have combined a months of work into this post, which is all about electricals. Whilst I did a lot of work figuring out and labelling the wiring harness that I bought off eBay, there is still a lot to figure out – largely by trial and error.
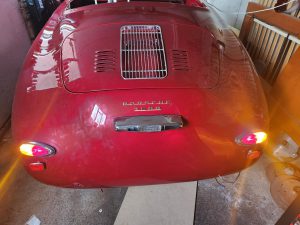
I have now sorted out the headlights, taillights, and indicators – albeit the latter are flashing too quickly due to the LED side repeaters. I have looked and you can get specialist LED compatible flasher relays, or add a resistor to the LED repeaters (one for another day)
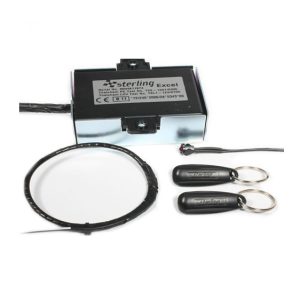
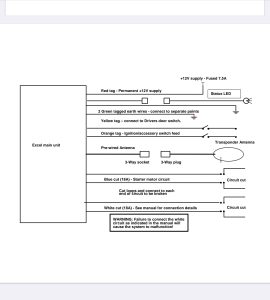
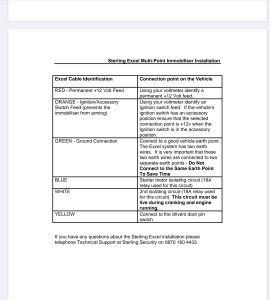
I have also installed the IVA compliant Thatcham immobiliser. This required a bit of splicing into the wiring loom, as you can see from the manual in the images below, you need to wire the immobiliser in series with the starter motor and coil feed (+), plus feeds from switched and unswitched live.
However, one this is done, it works really well and I have placed the coil behind the ignition switch, which means that when the key is inserted (with immobiliser fob attached) it will allow ignition. This configuration is neater and simpler to use than alternatives, such as inserting a second key of touching the fob elsewhere in the car.
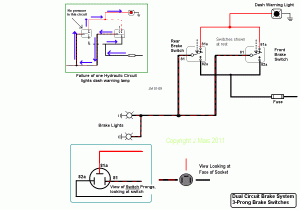
I have also wired up the majority of the rest of the electrics, such as the oil temperature sensor, oil pressure switch, reverse light, fuel level sensor, and brake pressure sensors. The latter have to wired in the following way to ensure correct operation. In normal conditions, which the brake pedal is pressed, the pressure switch on both the front and rear circuits make contact and illuminate the rear brake lights. If one of the brake circuits have failed (lost pressure) then that switch will not activate on braking, allowing current to pass through that one to the dash warning light (as per the illustration below).